
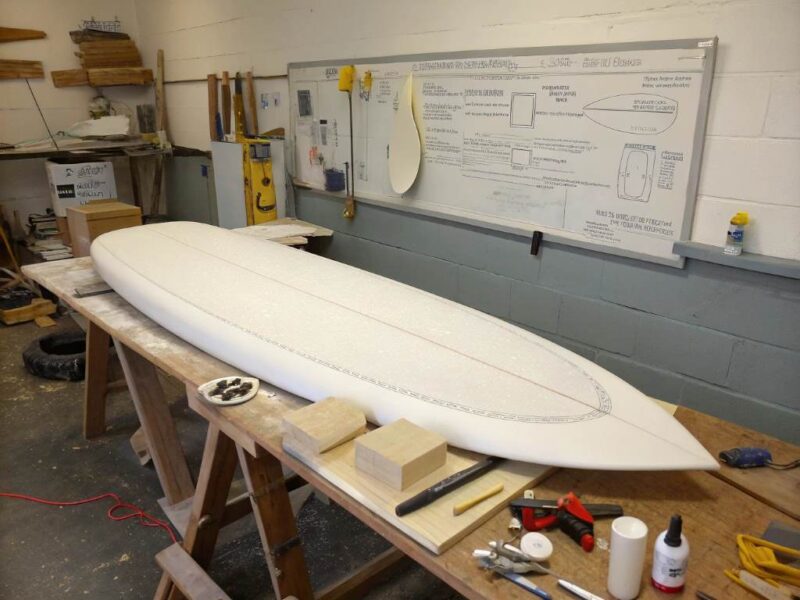
Ever dreamed of riding a wave on a board you crafted yourself? Learning how to shape a surfboard from scratch is a rewarding journey, transforming raw materials into a personalized wave-riding machine. This guide will walk you through the essential steps, providing a clear roadmap for beginners eager to dive into the art of surfboard shaping.
Gathering Your Essential Surfboard Shaping Tools and Materials
Before you begin, ensure you have all the necessary tools and materials. This preparation is crucial for a smooth and efficient shaping process.
- Foam Blank: The core of your surfboard, available in various sizes and densities.
- Shaping Tools: Includes a planer, surform, sanding blocks, and measuring tools.
- Resin and Fiberglass Cloth: For laminating the shaped foam.
- Safety Gear: Dust mask, gloves, and eye protection are essential.
- Shaping Stand: Provides a stable platform for your work.
- Templates: Used to guide the outline and rocker.
Understanding the Foam Blank and Its Importance
The foam blank is the foundation of your surfboard. Selecting the right type and size is vital for the board’s performance. Different foam densities affect buoyancy and flex. Consider the intended wave conditions and your surfing style when choosing.
Essential Shaping Tools for Beginners
- Electric Planer: Used for rough shaping and removing large amounts of foam.
- Surform: A hand tool for finer shaping and contouring.
- Sanding Blocks: Progress from coarse to fine grits for a smooth finish.
- Measuring Tools: Tape measure, ruler, and calipers for accurate dimensions.
The Step-by-Step Surfboard Shaping Process

Now, let’s delve into the detailed steps of shaping your surfboard. This process requires patience and precision.
1. Planning and Marking the Outline
Begin by transferring the template onto the foam blank. Use a pencil to trace the outline accurately. This step sets the foundation for the board’s overall shape.
2. Rough Shaping with the Planer
Using the electric planer, carefully remove excess foam to create the basic outline. Focus on achieving the desired thickness and curve. Take your time and check your work frequently.
3. Refining the Shape with the Surform
Switch to the surform for finer shaping and contouring. This tool allows for more precise adjustments to the rails, deck, and bottom. Pay close attention to the board’s symmetry and flow.
4. Shaping the Rails: From Soft to Hard
Rails play a significant role in the board’s performance. Begin with a softer rail shape and gradually refine it based on your surfing style. Harder rails offer better hold in powerful waves, while softer rails are more forgiving.
5. Creating the Rocker: The Curve of the Board
The rocker influences the board’s maneuverability and speed. Use templates and your shaping tools to achieve the desired curve in the nose and tail. A well-defined rocker is vital for optimal performance.
6. Fine Sanding and Smoothing
Progress through various grits of sandpaper to smooth the foam surface. This step eliminates any imperfections and prepares the board for lamination.
7. Laminating the Surfboard: Applying Resin and Fiberglass
Lamination involves applying resin and fiberglass cloth to the shaped foam. This process strengthens the board and provides a waterproof outer layer.
- Preparing the Resin: Mix the resin and catalyst according to the manufacturer’s instructions.
- Applying the Fiberglass Cloth: Lay the cloth over the foam and apply the resin evenly.
- Sanding and Finishing: After the resin cures, sand the surface smooth and apply a gloss or matte finish.
8. Fin Installation and Final Touches
Install fin boxes or plugs according to your fin setup. Add any final touches, such as leash plugs or traction pads. Inspect the board thoroughly before taking it to the water.
Tips for Successful Surfboard Shaping
- Start with Simple Designs: Begin with basic surfboard shapes like a fish or mini-malibu.
- Practice Makes Perfect: Don’t be discouraged by initial mistakes; each board is a learning experience.
- Take Your Time: Rushing the process can lead to errors and imperfections.
- Seek Expert Advice: Consult experienced shapers or online resources for guidance.
- Safety First: Always wear safety gear to protect yourself from dust and chemicals.
Maintaining Your Hand-Shaped Surfboard
Proper maintenance extends the life of your surfboard. Rinse it with fresh water after each use and store it in a cool, dry place away from direct sunlight. Regularly inspect for dings and repair them promptly.
Embrace the Art of Surfboard Shaping
Learning how to shape a surfboard is a journey of creativity and craftsmanship. It allows you to create a unique board tailored to your preferences and surfing style.
Ready to embark on your surfboard shaping adventure? Start gathering your tools and materials, and let your creativity flow. Share your progress and inspire others to dive into this rewarding craft. Begin your journey today and experience the unparalleled joy of riding waves on a board you made yourself.