

To inflate a Skaddles Inflatable Paddle Board, place it flat, set the valve correctly, and connect the pump securely. Then pump steadily until the pressure reaches your model’s recommended PSI, without exceeding its maximum rating. Proper inflation usually takes about 5 to 15 minutes, depending on the pump and board size. A correctly inflated board feels firm and resists noticeable flex under normal weight. Before launching, check the valve, deck, fins, leash, and pump connection. If you are learning how the Skaddles Inflatable Paddle Board works, mastering inflation makes every future setup easier. Research across inflatable SUP guides commonly places normal operating pressure around 12 to 15 PSI, although your specific model always takes priority.
Key Takeaways
- Lay the board on a clean, smooth surface before connecting the pump.
- Set the valve pin correctly before adding any air.
- Use a compatible SUP pump with a secure hose connection.
- Follow the PSI range printed on your specific Skaddles board.
- Switch pumping modes when resistance increases near full pressure.
- Protect the inflated board from excessive heat and direct sunlight.
- Complete a quick equipment inspection before entering the water.
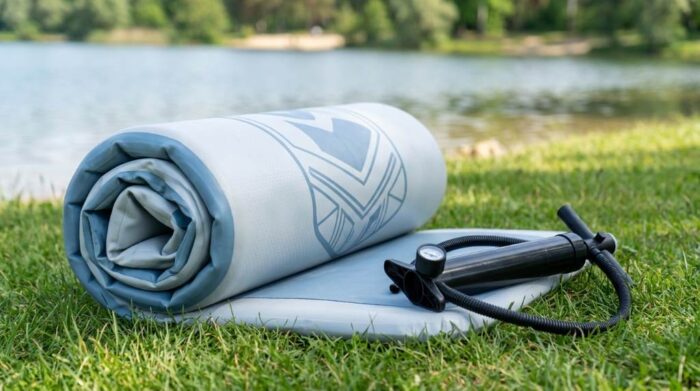
What You Need Before Inflation
Start by gathering every item before unfolding the board. You need the Skaddles board, compatible pump, hose, pressure gauge, and included accessories.
A dual-action SUP pump works well because it moves air during both strokes. However, an electric pump can reduce physical effort during repeated outings.
Also choose a clean inflation area before opening the bag. Avoid sharp rocks, broken shells, rough concrete, exposed screws, and other damaging surfaces.
Choose the Right Inflation Location
Lay the board completely flat with the deck facing upward. Keep the valve accessible and prevent the board from rubbing against abrasive surfaces.
Furthermore, avoid leaving the board on hot pavement during inflation. Excessive heat can increase internal air pressure after you finish pumping.
Step 1: Unroll and Inspect the Board
Remove the board from its storage bag and unroll it carefully. Smooth out folds before connecting the pump.
Next, inspect the rails, deck pad, valve area, and seams. Look for visible cuts, unusual bulges, damaged fittings, or foreign debris.
This quick inspection can prevent problems from becoming more serious later. If you notice significant damage, repair it before inflation.
Step 2: Prepare the Inflation Valve
Locate the inflation valve, which usually sits toward the rear section of the board. Remove its protective cap carefully and inspect the center pin.
The valve must sit in the correct inflation position before you begin. On common SUP valves, the spring-loaded pin stays raised when the valve seals air inside.
If the pin sits incorrectly, gently press and rotate it according to the valve design. Never force the mechanism because excessive pressure can damage the valve.
Why the Valve Position Matters
A valve set incorrectly can release air while you disconnect the hose. That mistake can make a properly inflated board suddenly feel soft.
Therefore, check the pin before every inflation session. A five-second valve check can prevent several minutes of unnecessary pumping.
Step 3: Connect the Pump Correctly
Attach the correct hose adapter to the pump before connecting the other end. Then insert the hose into the board’s inflation valve.
Turn the connector until it locks securely. The connection should feel firm without requiring excessive force.
If the hose keeps slipping, stop pumping and inspect the threads. A loose connection can waste air and make the board inflate unusually slowly.
Step 4: Start With Steady Pump Strokes
Begin with controlled strokes instead of rushing through the first stage. Long, consistent movements usually provide better airflow than short, frantic strokes.
Keep the pump upright while operating it. Use your legs and body weight when possible to reduce unnecessary arm fatigue.
With a dual-action pump, both directions push air into the board. This method saves time during the lower-pressure portion of inflation.
When Pumping Gets Harder
Inflation naturally becomes harder as internal pressure increases. The final portion requires more effort because the pump works against greater resistance.
At that point, switch to the pump’s single-action setting if available. Single-action pumping can make high-pressure finishing strokes considerably easier.
Do not interpret increased resistance as a problem by itself. Resistance near the recommended pressure often indicates normal inflation progress.
Step 5: Monitor the PSI Carefully
Use the pump gauge instead of judging pressure solely with your hands. A board can feel firm before reaching its recommended operating pressure.
Most inflatable SUPs operate somewhere around 12 to 15 PSI. However, Skaddles models can differ, so follow the pressure specification for your exact board.
Never exceed the maximum pressure printed on the board or supplied documentation. More pressure does not automatically produce better performance.
| Inflation Check | What to Do | Why It Matters |
|---|---|---|
| Valve position | Confirm the valve seals correctly | Prevents unnecessary air loss |
| Hose connection | Secure the connector firmly | Improves inflation efficiency |
| Pressure gauge | Monitor the recommended PSI | Prevents underinflation and overinflation |
| Board shape | Check for even expansion | Helps identify abnormal inflation |
| Final firmness | Confirm minimal flex | Supports stability and tracking |
What If the Gauge Does Not Move?
Some SUP pump gauges show little movement during the earliest inflation stage. Therefore, a stationary needle does not automatically indicate a faulty pump.
Continue pumping while checking the board’s shape and hose connection. If pressure remains unchanged after substantial inflation, inspect the valve and pump fittings.
Step 6: Finish Inflation Without Overdoing It
Continue pumping until the gauge reaches the pressure specified for your Skaddles model. Then stop immediately rather than adding extra pressure for firmness.
Overinflation can place unnecessary stress on seams, valve components, and surrounding materials. It also becomes more concerning when the board heats up under direct sunlight.
For that reason, inflate in a shaded or moderate-temperature area whenever practical. Recheck the pressure after moving the board into significantly hotter conditions.
Step 7: Remove the Pump and Seal the Valve
Once you reach the correct pressure, disconnect the hose carefully. A brief hiss can occur during removal and does not necessarily indicate a leak.
Immediately replace the valve cap and tighten it securely. The cap protects the valve from sand, dust, water, and accidental contact.
Do not repeatedly press the valve pin after reaching operating pressure. Unnecessary pressing can release air and force you to inflate the board again.
Step 8: Check the Board Before Launching
Walk around the entire board and inspect its shape. Look for uneven expansion, soft sections, damaged seams, or suspicious air loss.
Next, install removable fins according to their specific mounting system. Make sure each fin locks securely before carrying the board toward the water.
Attach the leash when appropriate for your paddling conditions. Also adjust the paddle to a comfortable height before launching.
Use a Simple Pre-Launch Checklist
- Board reaches the recommended PSI.
- Valve cap sits securely.
- Deck surface remains clean and intact.
- Removable fin locks correctly.
- Leash attaches securely.
- Paddle adjusts correctly.
- Board shows no obvious damage or unusual deformation.
Manual Pump vs. Electric Pump
A manual pump provides a reliable solution without batteries or electrical connections. It also lets you control inflation gradually while watching the pressure gauge.
An electric SUP pump can make setup easier, especially for frequent paddlers. However, choose a pump with adjustable pressure and automatic shutoff features.
| Feature | Manual Pump | Electric Pump |
|---|---|---|
| Power source | Human effort | Battery or vehicle power |
| Physical effort | Higher | Lower |
| Setup control | Very direct | Mostly automatic |
| Portability | Simple and dependable | Depends on power source |
| Best use | Occasional paddling | Frequent or effortless setup |
Common Inflation Problems and Fixes
The Board Will Not Inflate
First, check whether the hose actually connects to the valve. Then inspect the valve pin and confirm the pump uses the correct connection.
If the pump moves air but the board remains soft, check for an open valve. Also inspect the hose for cracks, loose fittings, or damaged seals.
The Board Loses Air After Hose Removal
A small release of air during hose removal can happen with some valve designs. However, continuous air loss requires further inspection.
Check that the valve pin sits correctly and the cap threads smoothly. If the valve continues leaking, stop using the board until you identify the cause.
The Board Feels Too Soft
Check the pressure gauge before adding more air. If the board sits below its recommended PSI, continue inflation carefully.
Temperature can also affect perceived firmness and pressure. Let a hot board cool before making significant pressure adjustments.
The Pump Becomes Extremely Difficult
Some resistance is normal near full pressure. However, unusually extreme resistance can indicate an incorrect pump setting or connection problem.
Switch from dual action to single action when your pump supports that option. Then continue with controlled strokes while watching the gauge.
How to Prevent Inflation Mistakes
The biggest mistake involves stopping when the board simply feels firm. Inflatable boards can feel rigid while still sitting below their recommended operating pressure.
Another common mistake involves guessing the pressure. Always rely on the board’s specified PSI and a functioning gauge.
Also avoid inflating beside sharp debris. A puncture discovered immediately before launching can quickly ruin your planned outing.
How Heat Changes Paddle Board Pressure
Air expands as temperature rises, which can increase pressure inside an inflated board. Therefore, a board inflated in shade can behave differently under strong sunlight.
Never compensate for heat by exceeding the board’s stated pressure limit. If the board becomes unusually hard after sitting in intense sun, move it into shade.
Allow the board to cool before checking its pressure again. This simple habit reduces unnecessary stress on the board’s materials and seams.
How Long Should Inflation Take?
Inflation time depends on board volume, pump type, pressure target, and pumping technique. A manual dual-action pump commonly requires several minutes of steady work.
An electric pump can shorten the physical setup substantially. Nevertheless, always supervise automatic inflation rather than treating the pump as completely unattended equipment.
For repeated use, focus on consistency rather than chasing the shortest inflation time. Correct pressure matters more than finishing a few minutes sooner.
Care After Inflation
Keep the inflated board away from unnecessary heat whenever possible. Do not drag it across rough ground because abrasion can weaken the outer material.
After paddling, rinse away salt, sand, mud, and other debris. Allow the board to dry thoroughly before long-term storage.
When storing the board, follow the manufacturer’s folding and pressure recommendations. Keep it in a cool, dry location away from sharp objects and prolonged sunlight.
When Should You Stop and Inspect the Board?
Stop using the board if you notice rapid pressure loss or a new bulge. Also stop if you hear persistent hissing after checking the valve.
Do not attempt to solve structural damage simply by adding more air. Pressure cannot correct damaged seams, punctures, or compromised valve components.
Instead, identify the affected area and follow the appropriate repair guidance. Professional inspection makes sense when the damage appears significant or uncertain.
A Faster Setup Routine for Regular Paddlers
Experienced paddlers can make inflation almost automatic by following the same sequence each time. Keep the pump, hose, fin, leash, and accessories together in one storage area.
First, unroll and inspect the board. Then check the valve, connect the pump, inflate to specification, seal the valve, and inspect the finished board.
This consistent routine reduces forgotten steps without encouraging rushed preparation. It also makes troubleshooting easier because you know which step changed when something feels different.
Frequently Asked Questions
What PSI should I use for a Skaddles inflatable paddle board?
Use the PSI specified for your exact Skaddles model and never exceed its stated maximum pressure.
Can I use an electric pump to inflate a Skaddles paddle board?
Yes, you can use a compatible SUP electric pump with adjustable pressure and a suitable valve adapter.
Why does my paddle board feel soft after inflation?
Check the pressure gauge, valve position, hose connection, temperature, and possible leaks before adding more air.
Should the valve pin stay up or down during inflation?
Use the valve position specified by your valve design so the valve seals correctly when you remove the pump.
Can I leave an inflated paddle board in direct sunlight?
Avoid prolonged direct sunlight because heat can increase internal pressure and place additional stress on the board.
Final Thoughts
Inflating a Skaddles paddle board becomes straightforward once you understand the valve, pump, and pressure sequence. The safest approach combines a clean setup area, correct valve positioning, steady pumping, and accurate PSI monitoring.
Before every launch, take a few extra moments to inspect the board and accessories. Follow the pressure specification for your exact model, protect the board from excessive heat, and never ignore unusual air loss.
Ready for your next paddling session? Inflate your Skaddles board correctly, complete the pre-launch checklist, and get on the water with confidence.