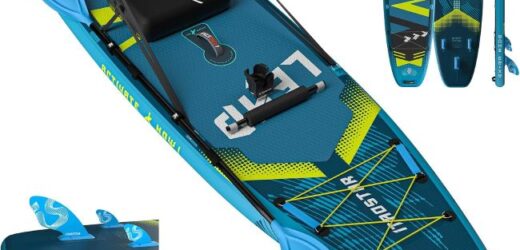

Ever wanted to capture the sleek lines and dynamic energy of a surfboard on paper? Learning how to draw a surfboard is a fun and rewarding artistic endeavor, perfect for beginners and seasoned artists alike. Whether you’re dreaming of epic waves or simply want to add a touch of beachy flair to your artwork, this comprehensive guide will walk you through the process, step by step. We’ll cover everything from basic shapes to intricate details, ensuring you create a visually stunning surfboard illustration.
-
Gathering Your Supplies and Setting the Stage

Before diving into the drawing process, ensure you have the necessary tools. This will help maintain a smooth and enjoyable creative experience.
- Pencils: A range of pencils, from hard (H) to soft (B), is ideal. Start with a hard pencil for initial sketches and use softer pencils for shading and details.
- Eraser: A good quality eraser is crucial for correcting mistakes and refining your lines.
- Paper: Choose smooth drawing paper that can handle pencil strokes and erasing.
- Ruler: A ruler will help you create straight lines for the surfboard’s outline.
- Reference Images: Having reference images of surfboards will help you understand their shape and proportions. Look for different surfboard designs to inspire your drawing.
-
Laying the Foundation: Sketching the Basic Surfboard Shape
The first step in how to draw a surfboard is to establish the basic shape. This foundation will guide the rest of your drawing.
2.1. Drawing the Centerline and Outline
- Begin by drawing a light, vertical line down the center of your paper. This centerline will serve as the surfboard’s axis of symmetry.
- Next, lightly sketch the overall outline of the surfboard. Think of it as a long, slightly curved rectangle with rounded ends. The exact shape will depend on the type of surfboard you want to create (e.g., shortboard, longboard, fish).
- Use your ruler to help create straight segments for the length of the board, and freehand for the curved nose and tail.
- Consider the surfboards volume and thickness in the sketch. This will provide a more realistic look.
2.2. Refining the Shape and Proportions
- Once you have the basic outline, refine the curves and adjust the proportions as needed. Pay close attention to the nose and tail shapes, as they vary significantly between surfboard designs.
- Ensure that both sides of the surfboard are symmetrical. Use your centerline as a guide to check the balance.
- Begin to round out any harsh lines, and start to visualize the surfboard’s rails.
-
Adding Details: Rails, Nose, and Tail
With the basic shape in place, it’s time to add details that will bring your surfboard to life.
3.1. Defining the Rails
- Surfboard rails are the edges of the board. Draw a slightly curved line along each side of the surfboard, parallel to the outer edge.
- The thickness and curvature of the rails can vary depending on the surfboard type. Thicker rails provide more stability, while thinner rails offer better maneuverability.
- Pay attention to how the rails curve as they approach the nose and tail.
3.2. Shaping the Nose and Tail
- The nose and tail shapes are crucial for defining the surfboard’s style. Shortboards typically have pointed or rounded noses and narrow tails, while longboards have wider, rounded noses and tails.
- Refine the curves of the nose and tail, ensuring they are smooth and symmetrical.
- Consider adding a slight curve to the bottom of the nose, known as the “rocker,” which helps prevent the surfboard from nose-diving.
3.3. Adding Fin Boxes and Fins (Optional)
- If you want to add fins to your surfboard, sketch small rectangles or trapezoids near the tail to represent the fin boxes.
- Draw the fins extending from the fin boxes. Fins can be single, twin, or thruster (three fins), depending on the surfboard design.
- Consider the fin angle and size.
-
Shading and Texturing: Bringing Depth to Your Drawing
Shading and texturing are essential for adding depth and realism to your surfboard drawing.
4.1. Basic Shading Techniques
- Use a softer pencil (e.g., 2B or 4B) to add shading to the surfboard. Apply light, even strokes, following the contours of the board.
- Pay attention to the light source and shade accordingly. Areas that are further from the light source should be darker.
- Use blending tools, such as a blending stump or cotton swab, to smooth out the shading and create a seamless gradient.
Read More Also: Anti-Slip Surfboard Traction Pads for Small Footed Riders: The Ultimate Guide to Enhanced Grip and Performance
4.2. Adding Highlights and Reflections
- Use a lighter pencil or eraser to add highlights to the surfboard. Highlights represent areas where light reflects off the surface.
- Pay attention to the curvature of the surfboard and place highlights accordingly.
- Consider adding subtle reflections to create a sense of depth and dimension.
4.3. Texturing the Surfboard Surface
- Add subtle textures to the surfboard surface to make it more realistic. You can use light pencil strokes to create a wood grain or fiberglass texture.
- Consider adding a leash plug near the tail and other details like a traction pad.
- Use reference images to guide your texturing.
-
Final Touches and Refinement
Once you’ve completed the shading and texturing, take a step back and review your drawing.
5.1. Checking for Accuracy and Symmetry
- Double-check the accuracy of your proportions and symmetry. Make any necessary adjustments.
- Ensure that all lines are clean and crisp.
- Look for any areas that need further refinement.
5.2. Adding Background and Context (Optional)
- Consider adding a background to your surfboard drawing. You could draw waves, a beach scene, or a sunset.
- Adding context can enhance the overall composition and create a more engaging artwork.
- If adding a background, ensure it complements the surfboard and doesn’t overpower it.
5.3. Signing Your Artwork
- Sign your artwork in a discreet location, such as the bottom corner.
- This adds a personal touch and marks your creation.
Learning how to draw a surfboard is a fantastic way to express your creativity and capture the spirit of surfing. By following this step-by-step guide, you’ll be well on your way to creating stunning surfboard illustrations. Remember to practice regularly and experiment with different styles and techniques.
Read More Also: Marine Grade Bluetooth Speaker Buoyancy: The Ultimate Guide for Water Enthusiasts
Ready to start your artistic journey? Grab your pencils and paper, and let the waves of creativity flow! Share your surfboard drawings with us in the comments below!